Build your own private cloud at home with a Raspberry Pi + Minio
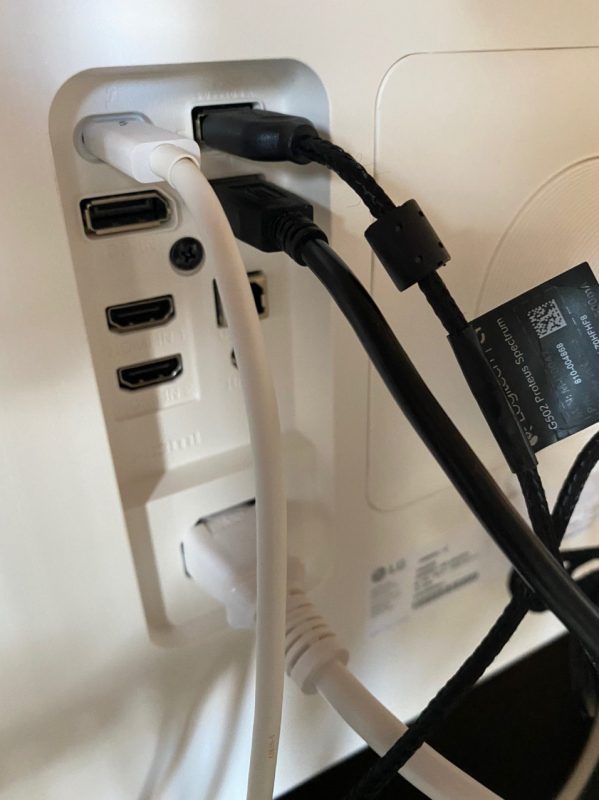
Early this year I got one of those widescreen 5k monitors so I could work from home, the display is so cool but the sad thing is it only comes with 2 USB ports. I have a wired mouse and keyboard so when I wanted to connect an external hard drive for copying and backing up files it was always a pain in the neck.
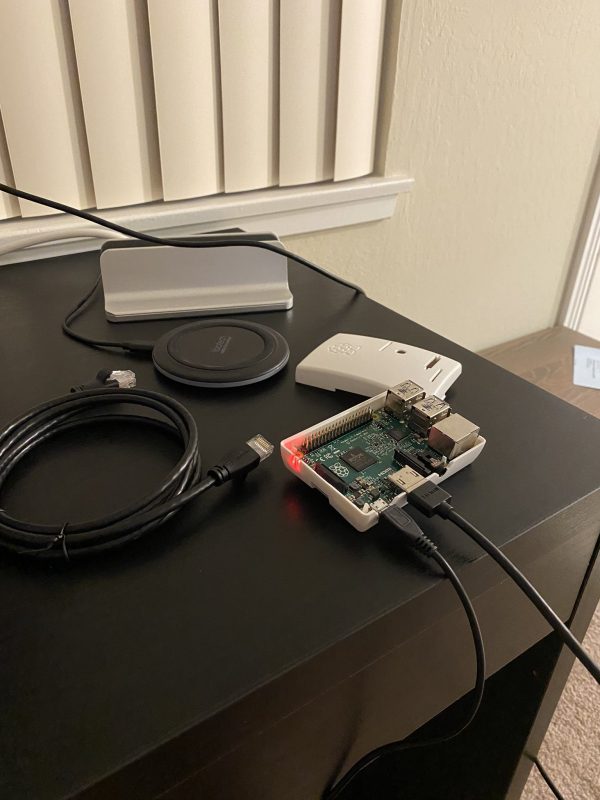
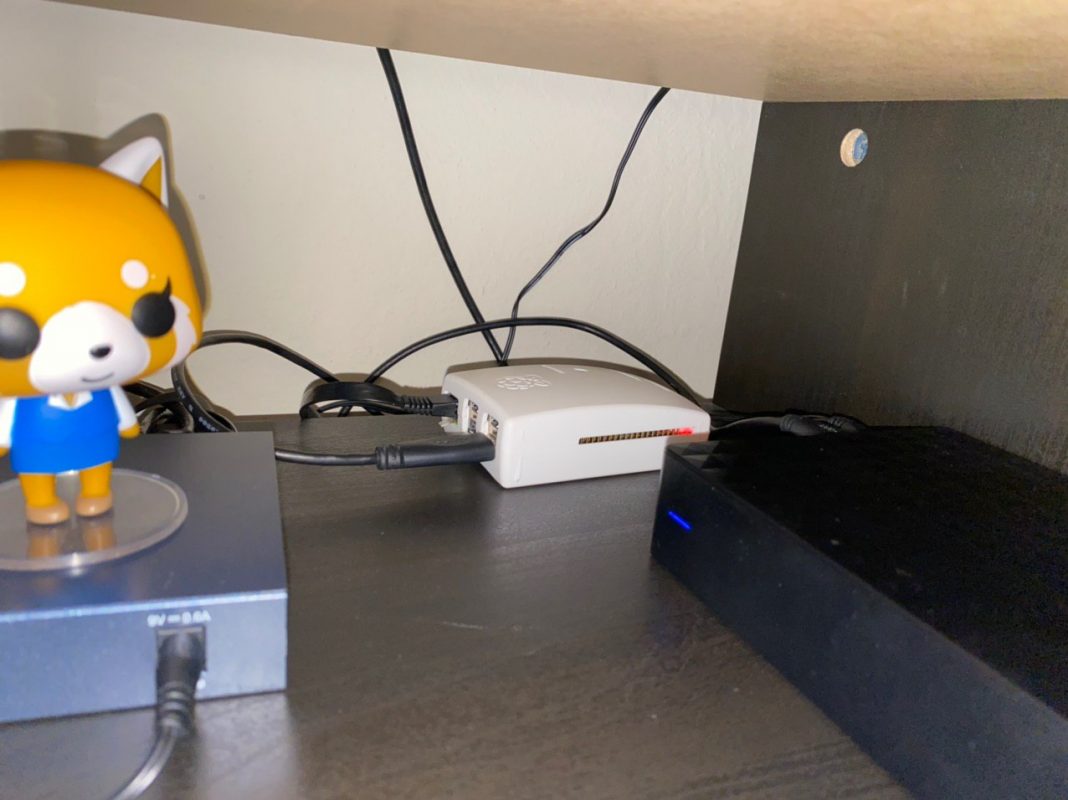
I remembered I have an old Raspberry PI2 I brought with me from México so last weekend I decided to work on a small personal project for solving this issue once and for all, I finished it and it’s working very well so I thought on writing a blogpost about it so more people can build its own private cloud at home too.
Install Raspbian
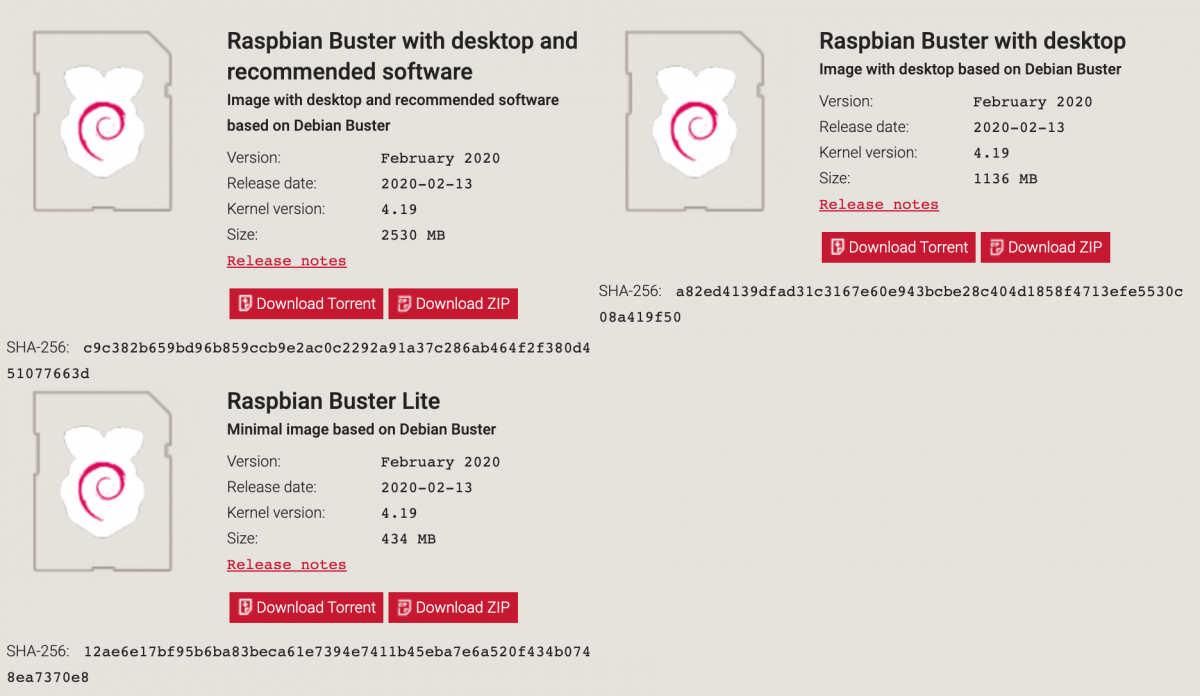
The first thing was to install a fresh version of raspbian into the raspberry pi, I got it from https://www.raspberrypi.org/downloads/raspbian/, I wanted something minimal so I got the Raspbian Buster Lite image, this version of raspbian doesn’t come with a graphical interface but it’s fine because ssh it’s all what we need.
Insert the SD card into your machine, I’m using a macbook pro so I have to use an adapter, once the card is there you can verify using the df command, tip: you can easily identify your SD card by the size reported by df -h.
df -h

Filesystem Size Used Avail Capacity iused ifree %iused Mounted on
/dev/disk1s5 466Gi 10Gi 246Gi 5% 487549 4881965331 0% /
devfs 338Ki 338Ki 0Bi 100% 1170 0 100% /dev
…
..
/dev/disk2s1 <————- my SD card
Before copying the image first you need to unmount the device using sudo umount /dev/disk2s1 after that you can use the dd command.
sudo dd bs=1m if=./2020-02-13-raspbian-buster-lite.img of=/dev/disk2s1
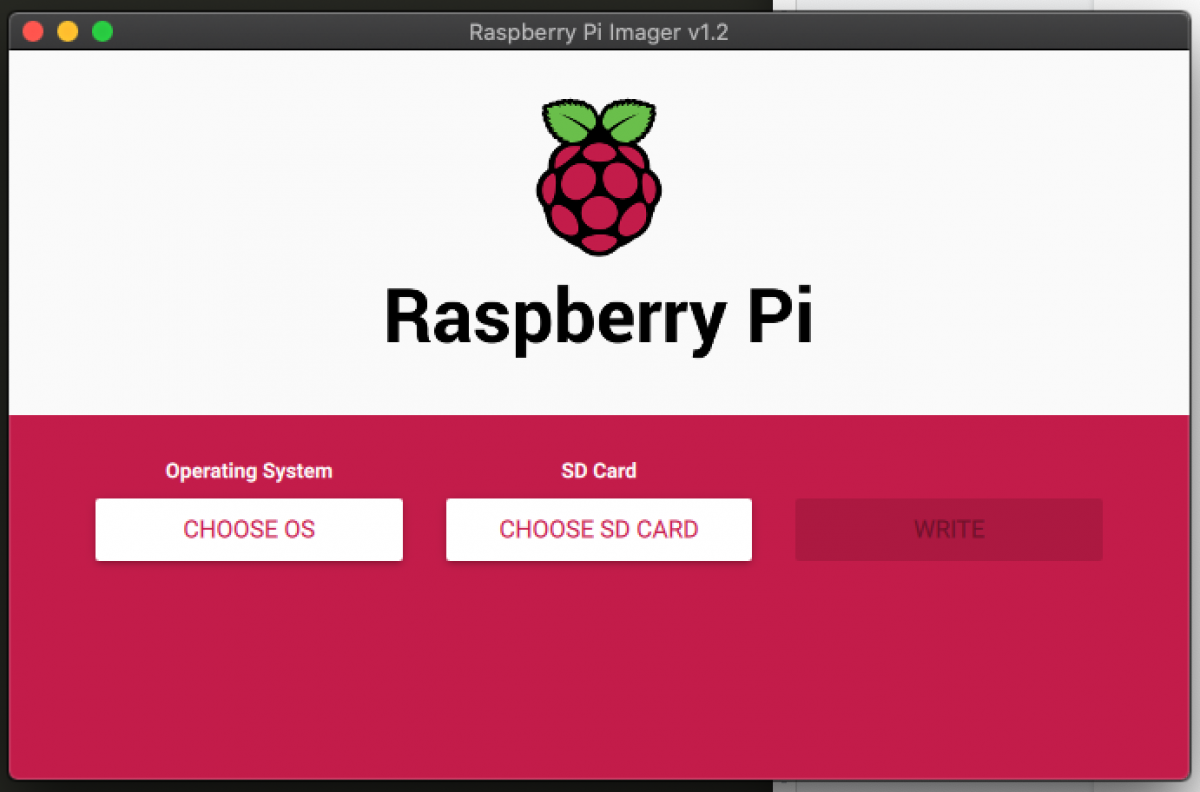
Optionally you can do all this process in a more friendly way by installing Raspberry Pi imager tool https://www.raspberrypi.org/downloads/, you need to insert your sd card, choose the os, choose the sd card and the click the write button.
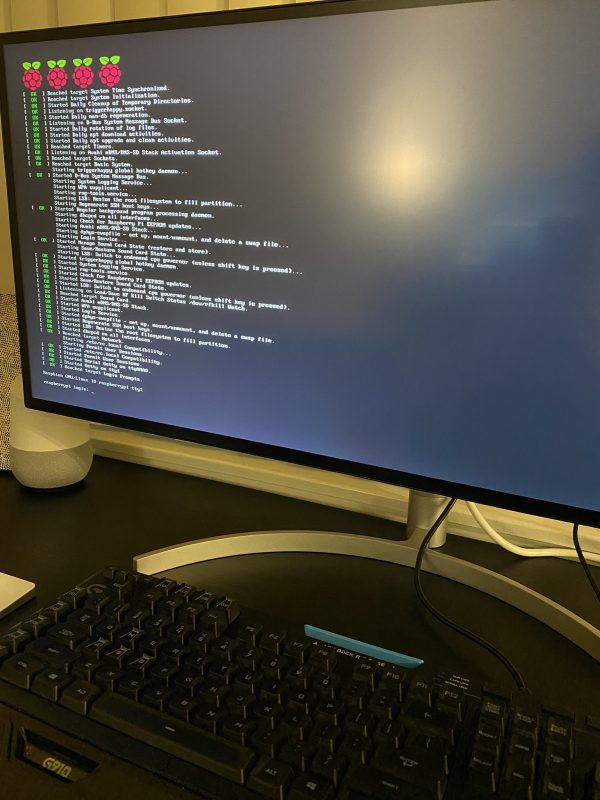
Once you have your fresh version of Raspbian installed it’s time to verify the Raspberry is working, the easiest way to do that is to connect a monitor and keyboard to it, so I did it.
When you connect the raspberry to the power the green led should start flashing, if that doesn’t happen is probably a sign of a corrupted EEPROM and you should look at the Recovery section of https://www.raspberrypi.org/downloads/.
Access the Raspberry Pi remotely
Alright, if you get to this point means your raspberry is fine, next step is to connect it to your network, I connected mine to my switch using an ethernet cable, before ssh into the raspberry first we need to get its IP, there are multiple ways to get the IP address assigned to your raspberry, I used nmap https://nmap.org/ to quickly scan my local network for new devices.
nmap -sP 192.168.86.0/24

Starting Nmap 7.80 ( https://nmap.org ) at 2020-03-29 19:55 PDT
Nmap scan report for testwifi.here (192.168.86.1)
…
..
Nmap scan report for raspberrypi (192.168.86.84)
Host is up (0.0082s latency).
…
..
Nmap done: 256 IP addresses (10 hosts up) scanned in 2.55 seconds
Ok from now on I’m going to start referring to the raspberry as nstorage (network storage), on my local machine I added a new entry to /etc/hosts with this information.
# Minio running in raspberry pi in home network
192.168.86.84 nstorage
192.168.86.84 raspberry
I also added a new entry on ~/.ssh/config so it is easier to connect via ssh.
Host nstorage
User pi
Hostname nstorage
Port 22
ServerAliveInterval 120
ServerAliveCountMax 30
You can type on your terminal ssh nstorage, and login using the default credentials: pi / raspberry.
ssh nstorage

Linux raspberrypi 4.19.97-v7+ #1294 SMP Thu Jan 30 13:15:58 GMT 2020 armv7l

The programs included with the Debian GNU/Linux system are free software;
the exact distribution terms for each program are described in the
individual files in /usr/share/doc/*/copyright.

Debian GNU/Linux comes with ABSOLUTELY NO WARRANTY, to the extent
permitted by applicable law.
Last login: Mon Mar 30 03:27:49 2020 from 192.168.86.64
pi@raspberrypi:~ $
First thing you should do is change the default password using the passwd command http://man7.org/linux/man-pages/man1/passwd.1.html.
One thing I always like to do is to add the public ssh key of my machine (my macbook pro) to the list of authorized_keys on the remote server (nstorage), you can do this by copying your public key: cat ~/.ssh/id_rsa.pub | pbcopy and then in nstorage in the /home/pi/.ssh/authorized_keys (create the file if it doesn’t exist) file append the key to the end.
pi@raspberrypi:~/.ssh $ cat authorized_keys
ssh-rsa AAAAB3NzaC1yc2EAAAADAQABAAABAQCvxqCsC2RWVfWfix/KT1R8eZ9zN5SXoZ8xV8eCsk47AZUkZKBdCLxp0arhS2/+WpjRAFuR4+XgmnWlu/rQYzWGaqv/sm5420zaF6fpOaeFXEuLGVP7Nb4e1oPR1tNbzZ7OLJs1FVZIk8rBeTfLh2+UMU8Lut+rKtd9FbW4LdTimscg8ufeFZ1bKWTPih4+o3kYEdSFpMz0ntKDqKA7g3Kvq6PbhUxcICA/KrJbjxTjuOelfqsfTz7xrJW/sII5QETTqL93ny7DlPdVdM2Qw6C/1NZ1hV7ZgpihFlD+XKhdqdugG9DgjzgKvdNx63idswCRJKmdxHZN+oM33+bASHMT [email protected]
That way next time you ssh into nstorage (the raspberry) the login process will be automatic.
Install Minio
You are on a fresh raspbian system, first thing you should do is update the existing software.
sudo apt-get update
sudo apt-get upgrade
After that lets download the minio server and the minio client, we also create symbolic links for both binaries.
wget https://dl.minio.io/server/minio/release/linux-arm/minio
wget https://dl.minio.io/client/mc/release/linux-arm/mc
sudo ln -s /home/pi/minio /usr/bin/minio
sudo ln -s /home/pi/mc /usr/bin/mc
At this point you can start a simple minio server with:
pi@raspberrypi:~ $ mkdir ~/data
pi@raspberrypi:~ $ minio server ~/data
Endpoint: https://192.168.86.84:9000 https://127.0.0.1:9000
AccessKey: minioadmin
SecretKey: minioadmin

Browser Access:
https://192.168.86.84:9000 https://127.0.0.1:9000

Command-line Access: https://docs.min.io/docs/minio-client-quickstart-guide
$ mc config host add myminio https://192.168.86.84:9000 minioadmin minioadmin

Object API (Amazon S3 compatible):
Go: https://docs.min.io/docs/golang-client-quickstart-guide
Java: https://docs.min.io/docs/java-client-quickstart-guide
Python: https://docs.min.io/docs/python-client-quickstart-guide
JavaScript: https://docs.min.io/docs/javascript-client-quickstart-guide
.NET: https://docs.min.io/docs/dotnet-client-quickstart-guide

Detected default credentials 'minioadmin:minioadmin', please change the credentials immediately using 'MINIO\_ACCESS\_KEY' and 'MINIO\_SECRET\_KEY'
In your local machine go to http://nstorage:9000/minio and you will see the following screen.
We are almost there, you have a minio server running in your raspberry pi, you can start uploading files and creating buckets if you want, but first let’s add some security.
Securing your Minio
Right now all the traffic between you and nstorage (your minio server) is unencrypted, let’s fix that quickly, I used mkcert https://github.com/FiloSottile/mkcert by Filippo Valsorda for quickly generate certificates signed by a custom certificate authority, sounds scary but is actually quite simple.
In the raspberry we are going to create the following folders to hold the certificates.
mkdir ~/.minio/certs/CAs
mkdir ~/.mc/certs/CAs
In your local machine we generate and push the certificates to the raspberry, dont forget to also push the public key of your local certificate authority created by mkert under /Users/$USER/Library/Application Support/mkcert/rootCA.pem.
$ mkcert nstorage
Using the local CA at "/Users/alevsk/Library/Application Support/mkcert" ✨

Created a new certificate valid for the following names 📜
– "nstorage"

The certificate is at "./nstorage.pem" and the key at "./nstorage-key.pem" ✅

$ ls nstorage*
nstorage-key.pem nstorage.pem
$ scp ./nstorage* pi@raspberry:~/.minio/certs
$ scp ./rootCA.pem pi@raspberry:~/.minio/certs/CAs
$ scp ./rootCA.pem pi@raspberry:~/.mc/certs/CAs
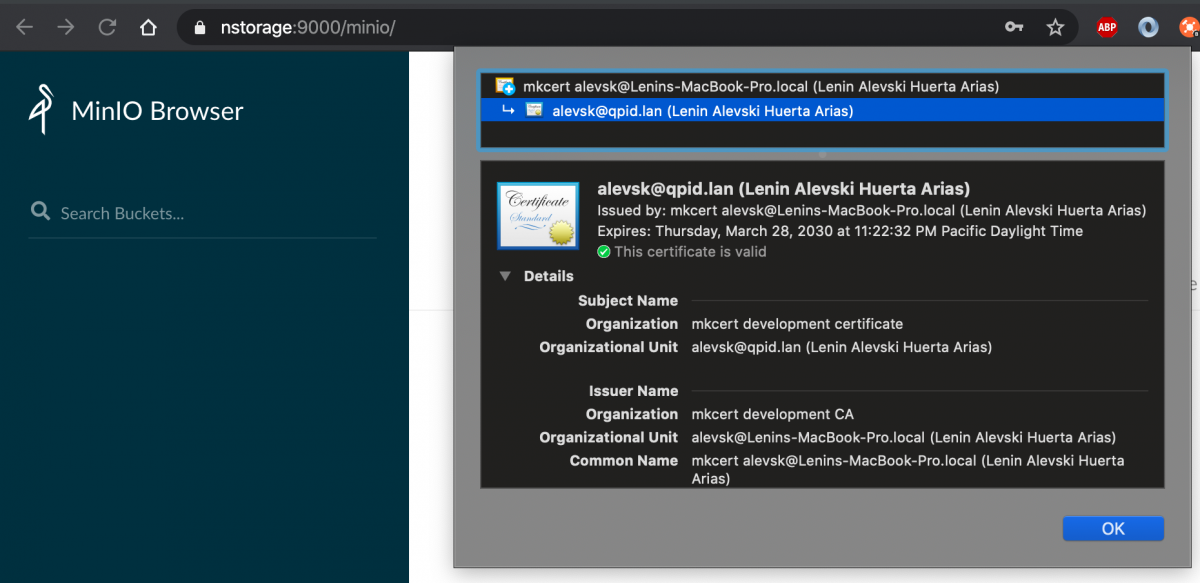
That’s it, you have now a secure connection with your Minio, if you go to your browser you can HTTPS this time.
Nstorage certificate is valid and trusted by your system because was generated by your local certificate authority, every device that wants to access this server need to trust the CA as well, otherwise it will get a trust error.
Mount external drive
Alright, so far you have a secure Minio running on the raspberry pi, in my case I used a 16GB SD card, which was not enough for storing all my data and the whole point was to access my external drive files remotely, so let’s do that now. But first instead of start Minio manually let’s create a bash script and change the default credentials.
Create a new file using vim or your editor of choice: vim start.sh
#!/bin/bash

export MINIO\_ACCESS\_KEY=SuperSecretAccessKey
export MINIO\_SECRET\_KEY=SuperSecretSecretKey
export MINIO_DOMAIN=nstorage
export MINIO\_DISK\_USAGE_CRAWL=off

minio server ~/data
Save the above lines and then give execution permissions to the script: chmod +x start.sh
Now you can start your Minio running ./start.sh
pi@raspberrypi:~ $ ./start.sh
Endpoint: https://192.168.86.84:9000 https://127.0.0.1:9000
AccessKey: SuperSecretAccessKey
SecretKey: SuperSecretSecretKey

Browser Access:
https://192.168.86.84:9000 https://127.0.0.1:9000

Command-line Access: https://docs.min.io/docs/minio-client-quickstart-guide
$ mc config host add myminio https://192.168.86.84:9000 SuperSecretAccessKey SuperSecretSecretKey

Object API (Amazon S3 compatible):
Go: https://docs.min.io/docs/golang-client-quickstart-guide
Java: https://docs.min.io/docs/java-client-quickstart-guide
Python: https://docs.min.io/docs/python-client-quickstart-guide
JavaScript: https://docs.min.io/docs/javascript-client-quickstart-guide
.NET: https://docs.min.io/docs/dotnet-client-quickstart-guide
Now connect your external hard drive to one of the USB ports, I had some issues while doing this, Raspbian was not listing the device under /dev so make sure to increase the USB ports power via configuration in /boot/config.txt, add max_usb_current=1 to the end of the file.
pi@raspberrypi:~ $ cat /boot/config.txt
# For more options and information see
# http://rpf.io/configtxt
# Some settings may impact device functionality. See link above for details
…
..
# Increase power available to USB ports
max\_usb\_current=1
Reboot the raspberry and plug your drive again, if everything went right you should be able to see your external drive using fdisk.
$ sudo fdisk -l
Disk /dev/sda: 4.6 TiB, 5000981077504 bytes, 9767541167 sectors
Disk model: Expansion Desk
Units: sectors of 1 * 512 = 512 bytes
Sector size (logical/physical): 512 bytes / 4096 bytes
I/O size (minimum/optimal): 4096 bytes / 4096 bytes
Disklabel type: gpt
Disk identifier: 24A09C07-313E-43B6-A811-FAF09DAB962C

Device Start End Sectors Size Type
/dev/sda1 34 262177 262144 128M Microsoft reserved
/dev/sda2 264192 9767540735 9767276544 4.6T Microsoft basic data
You can mount the device using the mount command https://linux.die.net/man/8/mount.
pi@raspberrypi:~ $ sudo mount -t ntfs /dev/sda2 /home/pi/data
pi@raspberrypi:~ $ ls -la data
total 9032
drwxrwxrwx 1 root root 8192 Mar 30 08:19 .
drwxr-xr-x 9 pi pi 4096 Mar 30 08:27 ..
drwxrwxrwx 1 root root 65536 Mar 26 22:53 anime
drwxrwxrwx 1 root root 20480 May 5 2019 anime_movies
drwxrwxrwx 1 root root 0 Jan 4 2019 backup
drwxrwxrwx 1 root root 4096 Jan 4 2019 books
drwxrwxrwx 1 root root 4096 Jan 4 2019 dev
drwxrwxrwx 1 root root 16384 Feb 12 2017 documents
drwxrwxrwx 1 root root 0 Feb 6 2017 download
drwxrwxrwx 1 root root 12288 Feb 12 2017 games
drwxrwxrwx 1 root root 4096 Jan 4 2019 images
drwxrwxrwx 1 root root 4096 Feb 10 2017 manga
drwxrwxrwx 1 root root 4096 Mar 29 07:48 .minio.sys
drwxrwxrwx 1 root root 65536 Mar 30 01:41 movies
drwxrwxrwx 1 root root 0 Jan 4 2019 music
drwxrwxrwx 1 root root 0 Feb 6 2017 pentest
drwxrwxrwx 1 root root 12288 Jun 2 2019 series
drwxrwxrwx 1 root root 4096 Jun 2 2019 software
drwxrwxrwx 1 root root 0 Jan 25 20:51 .Trashes
drwxrwxrwx 1 root root 0 Jun 21 2019 videos
pi@raspberrypi:~ $
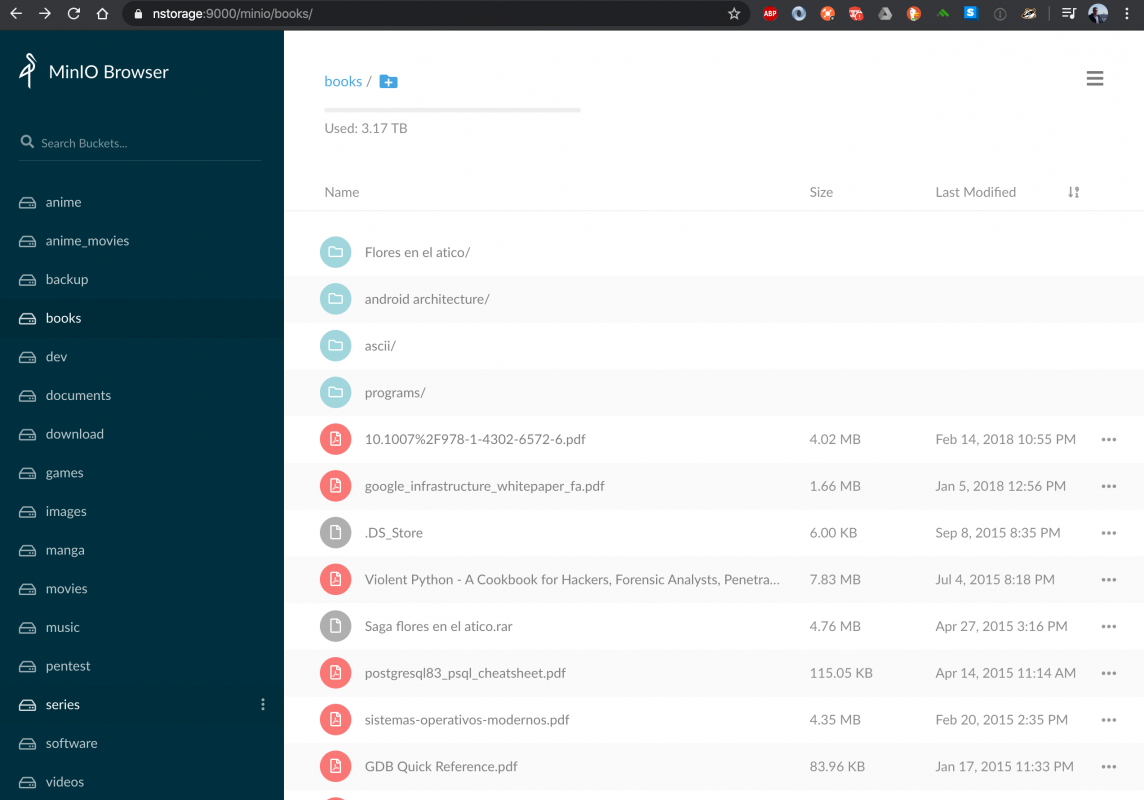
Restart your minio server and this time when you go to the browser you will see all your files there.
You can list all the files and buckets using the minio client (mc) from your local machine or using the mc binary inside the nstorage raspberry.
$ mc config host add nstorage https://nstorage:9000 SuperSecretAccessKey SuperSecretSecretKey
$ mc ls nstorage

[2020-03-26 15:53:09 PDT] 0B anime/
[2019-05-04 18:25:59 PDT] 0B anime_movies/
[2019-01-03 23:00:08 PST] 0B backup/
[2019-01-03 23:04:29 PST] 0B books/
[2019-01-03 23:48:04 PST] 0B dev/
[2017-02-11 17:09:28 PST] 0B documents/
[2017-02-05 16:45:21 PST] 0B download/
[2017-02-11 16:03:31 PST] 0B games/
[2019-01-03 23:06:48 PST] 0B /images/
[2017-02-10 11:50:31 PST] 0B manga/
[2020-03-29 17:41:41 PDT] 0B movies/
[2019-01-03 22:48:15 PST] 0B music/
[2017-02-05 22:14:30 PST] 0B pentest/
[2019-06-02 14:33:34 PDT] 0B series/
[2019-06-01 21:29:46 PDT] 0B software/
[2019-06-20 20:20:56 PDT] 0B videos/
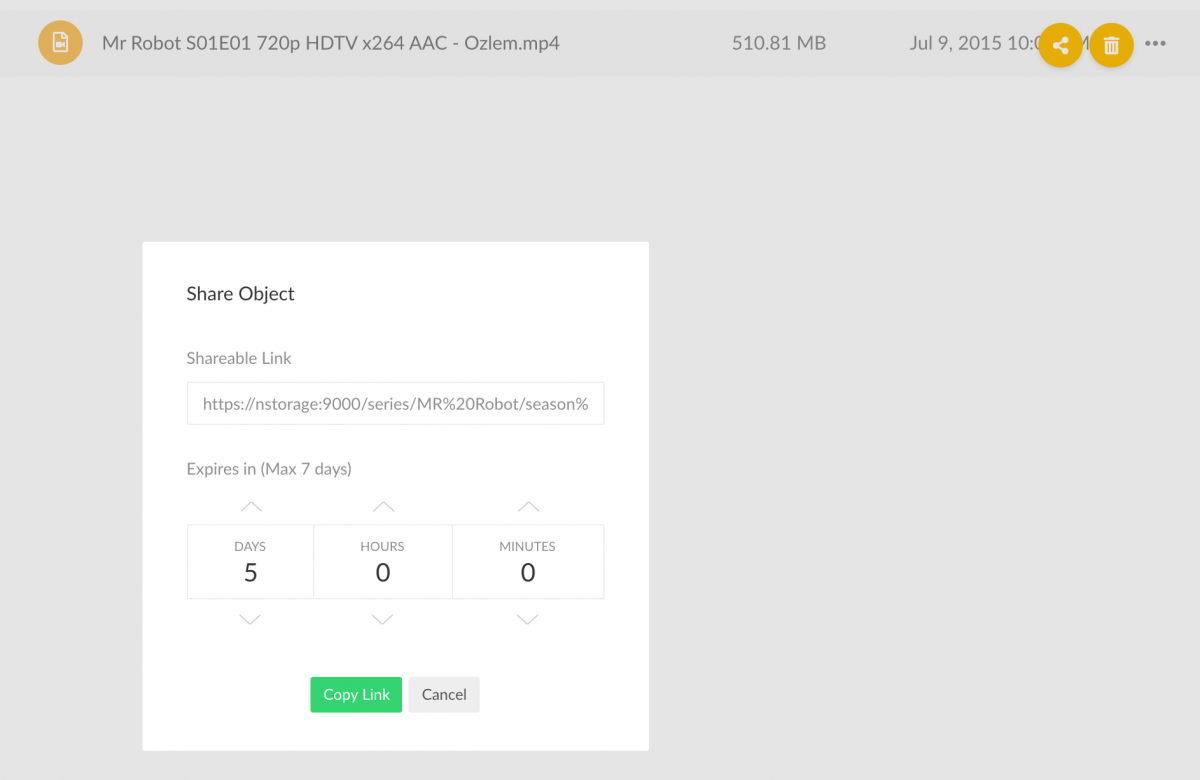
You can download every file you want, upload files and also stream media. Go to your Minio browser and select any video you like, click on the “3 dots" icon on the right and click the share icon.
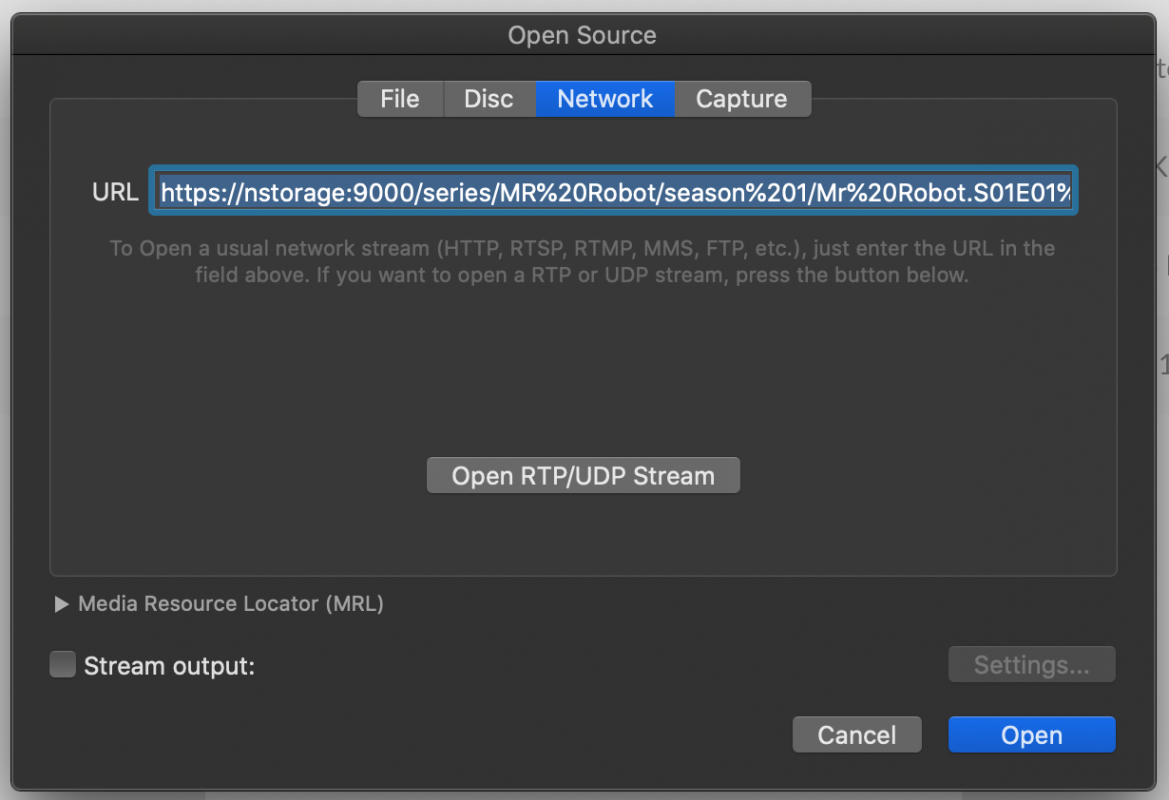
Minio will generate a pre-signed URL that you can use on VLC, click on File > Open Network and paste the video URL.
Click the open button and enjoy your videos.
Everything is great so far, you are able to access all your files from any device in your network but if your raspberry loses power and reboot you will need to mount the external drive and start the Minio server manually again so let’s automate that.
Mount the external drive with fstab
On linux by default every drive listed in /etc/fstab will be mounted on startup, there are many ways to mount drives but the recommended way is using UUID or PARTUUID instead of the name.
pi@raspberrypi:~ $ sudo blkid
…
…
…
/dev/sda2: LABEL="Arael" UUID="62F048D0F048AC5B" TYPE="ntfs" PTTYPE="atari" PARTLABEL="Basic data partition" PARTUUID="5206da84-ded1-43b6-abf2-14b5950c4d7c"
Locate the PARTUUID of your own drive, mine was 5206da84-ded1-43b6-abf2-14b5950c4d7c, and then add it at the end of your /etc/fstab file.
$ cat /etc/fstab

proc /proc proc defaults 0 0
PARTUUID=738a4d67-01 /boot vfat defaults 0 2
PARTUUID=738a4d67-02 / ext4 defaults,noatime 0 1
# a swapfile is not a swap partition, no line here
# use dphys-swapfile swap[on|off] for that
PARTUUID=5206da84-ded1-43b6-abf2-14b5950c4d7c /home/pi/data ntfs defaults,errors=remount-ro 0 1
Reboot your raspberry and verify your drive was mounted automatically under /home/pi/data.
Start the Minio server with systemctl
Finally, the last piece of the puzzle is to make minio to start automatically, again, there’s many ways to do this but in this tutorial we will do it with init system or systemctl, let’s create a file called minio.service with the following content.
[Unit]

Description=Minio Storage Service

After=network-online.target home-pi-data.mount

[Service]

ExecStart=/home/pi/start.sh

WorkingDirectory=/home/pi

StandardOutput=inherit

StandardError=inherit

Restart=always

User=pi

[Install]

WantedBy=multi-user.target
ExecStart points to the start.sh bash script, After directive will tell the Minio server to wait until the network service is online and the /dev/sda2 drive is mounted by fstab, home-pi-data.mount is a systemd mount unit you can get using the systemctl list-units command.
$ systemctl list-units | grep '/home/pi/data' | awk '{ print $1 }'
home-pi-data.mount
Copy the file to the /etc/systemd/system directory.
cp ./minio.service /etc/systemd/system/minio.service
Start minio as a systemd service using the start command and verify is running with the status command.
pi@raspberrypi:~ $ sudo systemctl start minio
pi@raspberrypi:~ $ sudo systemctl status minio
● minio.service – Minio Storage Service
Loaded: loaded (/etc/systemd/system/minio.service; enabled; vendor preset: enabled)
Active: active (running) since Mon 2020-03-30 10:12:22 BST; 4s ago
Main PID: 1453 (start.sh)
Tasks: 16 (limit: 2200)
Memory: 156.2M
CGroup: /system.slice/minio.service
├─1453 /bin/bash /home/pi/start.sh
└─1456 minio server /home/pi/data

Mar 30 10:12:22 raspberrypi systemd[1]: Started Minio Storage Service.
If everything looks fine, enable the service, Minio will start automatically every time your Raspberry pi boot.
sudo systemctl enable minio
Reboot your raspberry pi one last time and verify everything is working as expected, if you are able to see the minio browser at https://nstorage:9000/minio without you having to do anything congratulations you now have your own private cloud at home powered by Minio :).
Happy hacking.
